Settings & Users
Configure your business, customise how MyShop looks and behaves, and control who can access what.
Navigating Settings
Settings is divided into five tabs. Each tab controls a different area of your shop:
Company
Business name, logo, address, currency, and invoice settings.
Theme
Dark or light mode, and colour presets for the app interface.
Taxes
Create tax rates and enable/disable them per transaction type.
Payments
Enable or disable payment methods, and add custom payment channels.
Marketing Sources
The list of channels you can tag on orders (social media, referral, etc.).
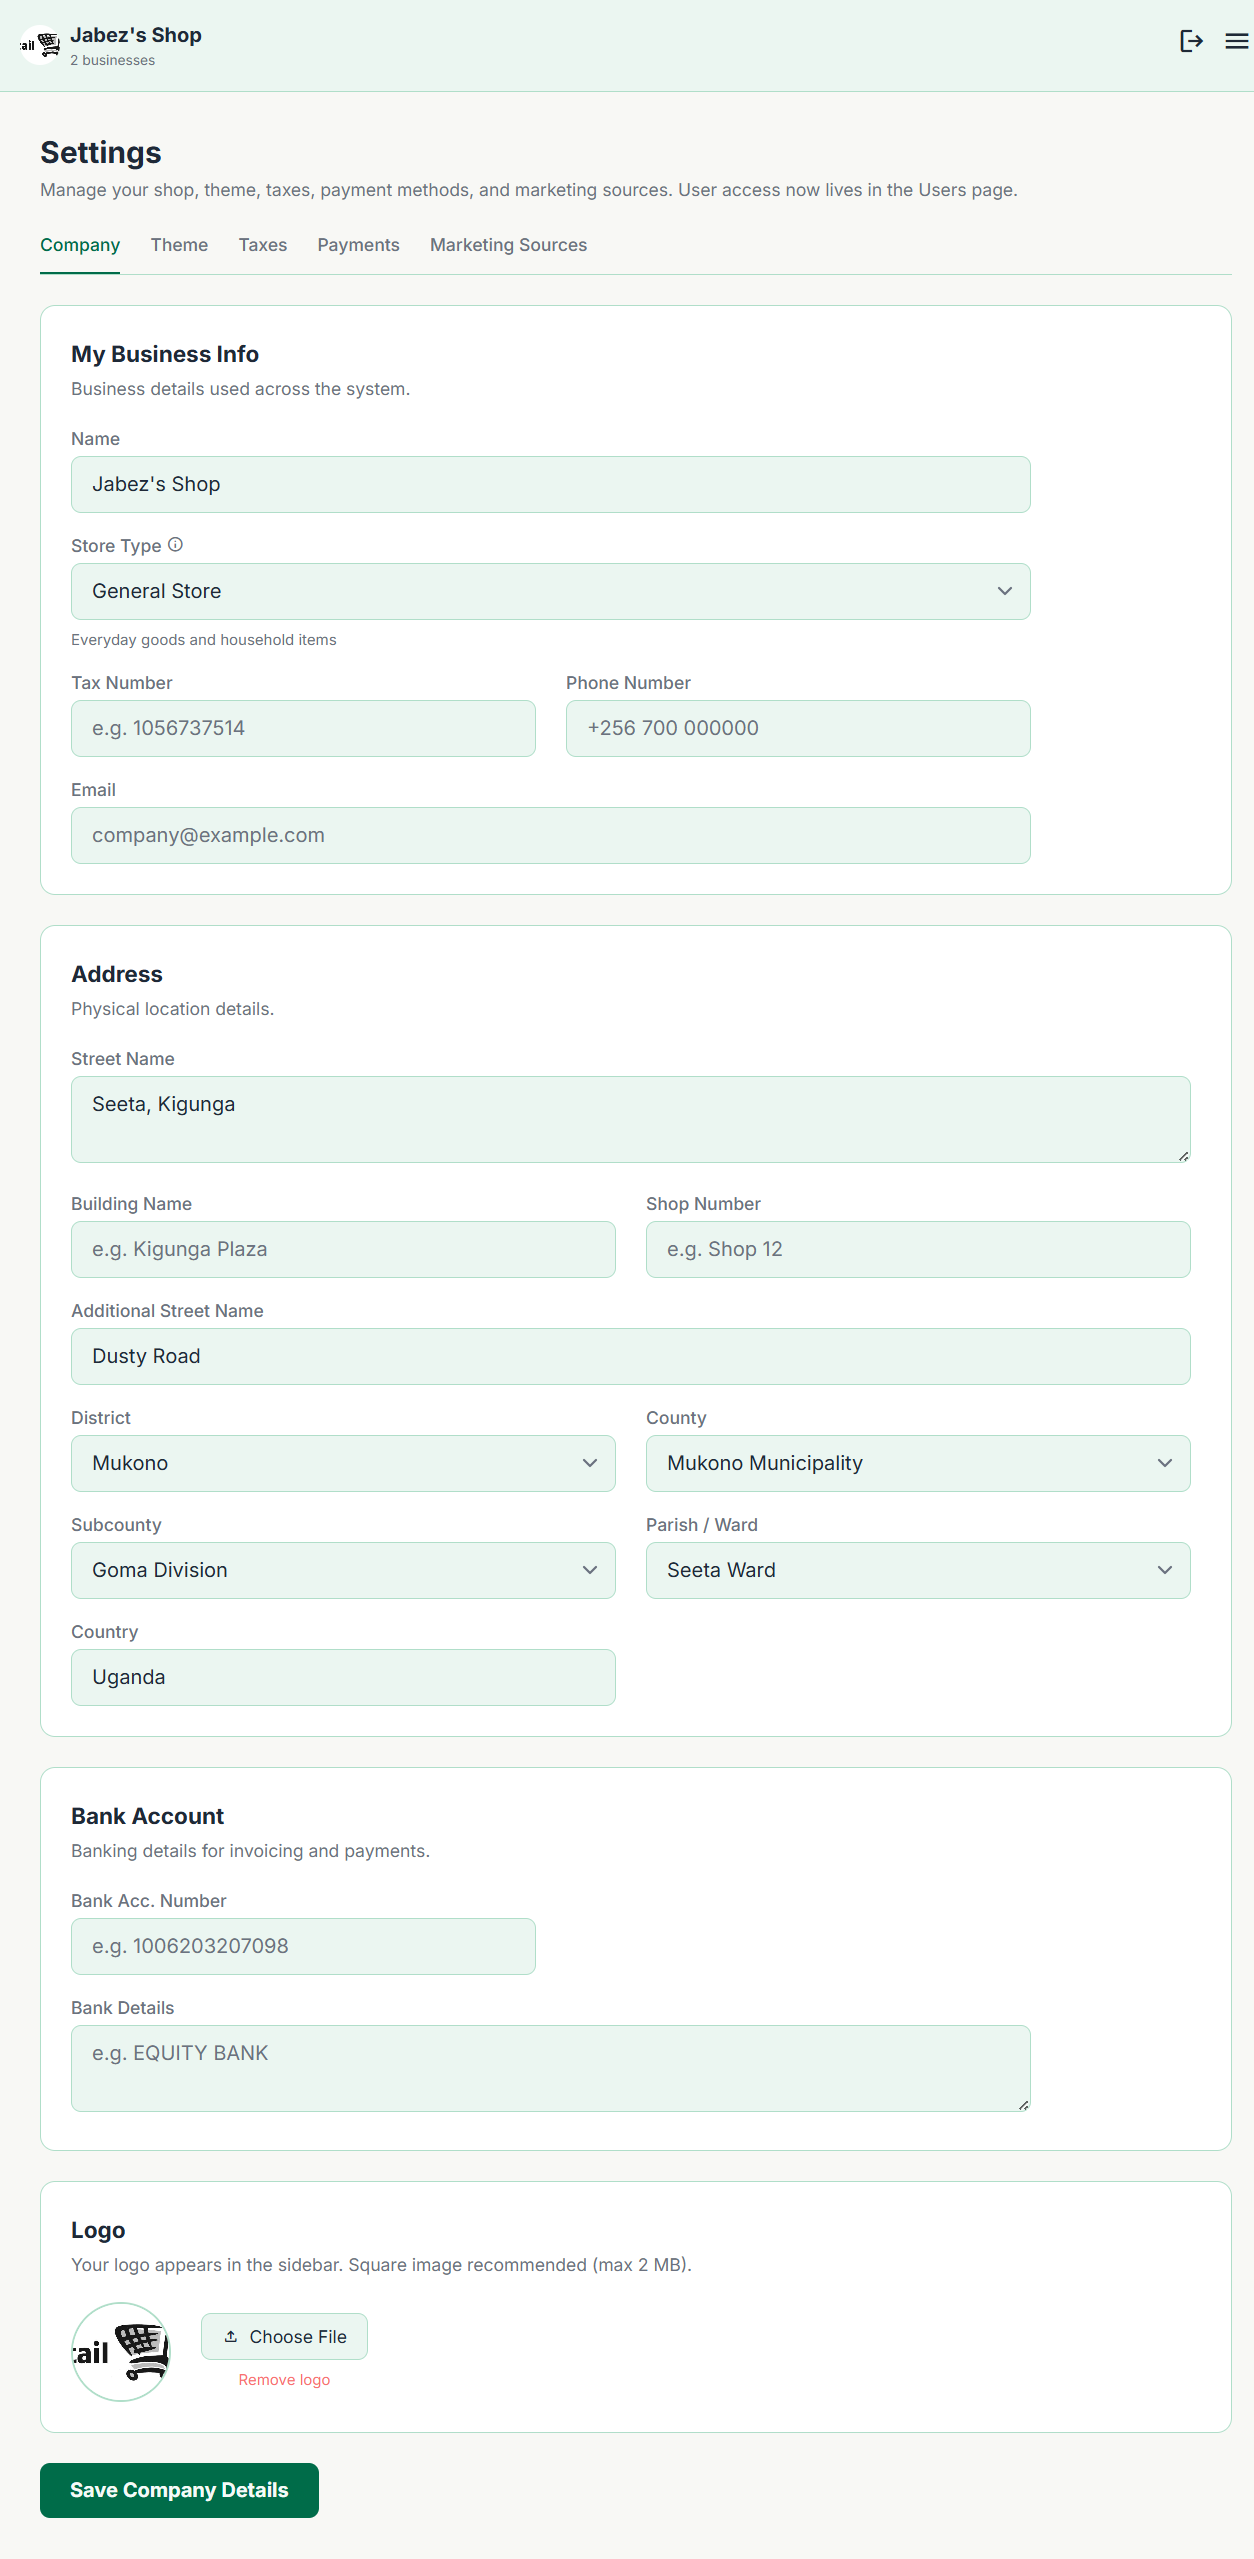
Company Tab
This is the first tab to set up when you start using MyShop. The information here appears on your invoices and in reports.
- business Business name — Appears as the trading name on invoices and GRNs.
- image Logo — Uploaded image used on PDF invoices. Recommended size: square, at least 200×200 px.
- location_on Address & contact — Shown in the header of invoices so customers know how to reach you.
Theme Tab
The Theme tab controls how the MyShop application looks for users of this shop.
Dark / Light mode
Toggle between dark and light themes for the app interface. Each user sees the shop's chosen theme when they log in.
Colour preset
Choose from a set of colour schemes for the accent colour used across buttons, highlights, and icons.
Theme changes take effect immediately. If a user has a personal preference, they can also adjust the theme from their own profile page without affecting the shop's default.
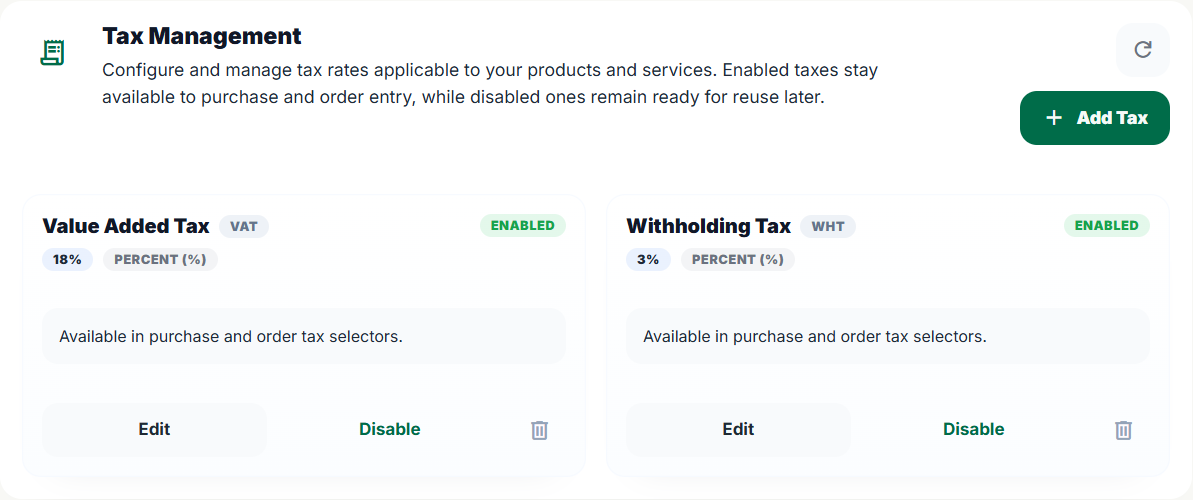
Taxes Tab
If your business charges tax on sales (e.g. VAT, sales tax), set up your tax rates here. Each rate has a name, code, value, and active status. Enabled taxes become available on product forms and transaction lines.
-
1
Click + Add Tax Rate
Give it a name (e.g. "VAT 18%"), code, and value. VAT can be protected so it feeds into VAT reporting.
-
2
Enable it
Toggle the rate on. Enabled rates appear as options when creating products, sales, orders, and purchases.
-
3
Apply to transactions
Assign taxes to products when needed. Product forms show a tax preview with tax amount, pre-tax subtotal, and customer total.
You can create multiple tax rates (e.g. for different product categories or customer types) and disable any that are no longer applicable. Protected VAT values also appear in the VAT Center and Balance Sheet on Pro.
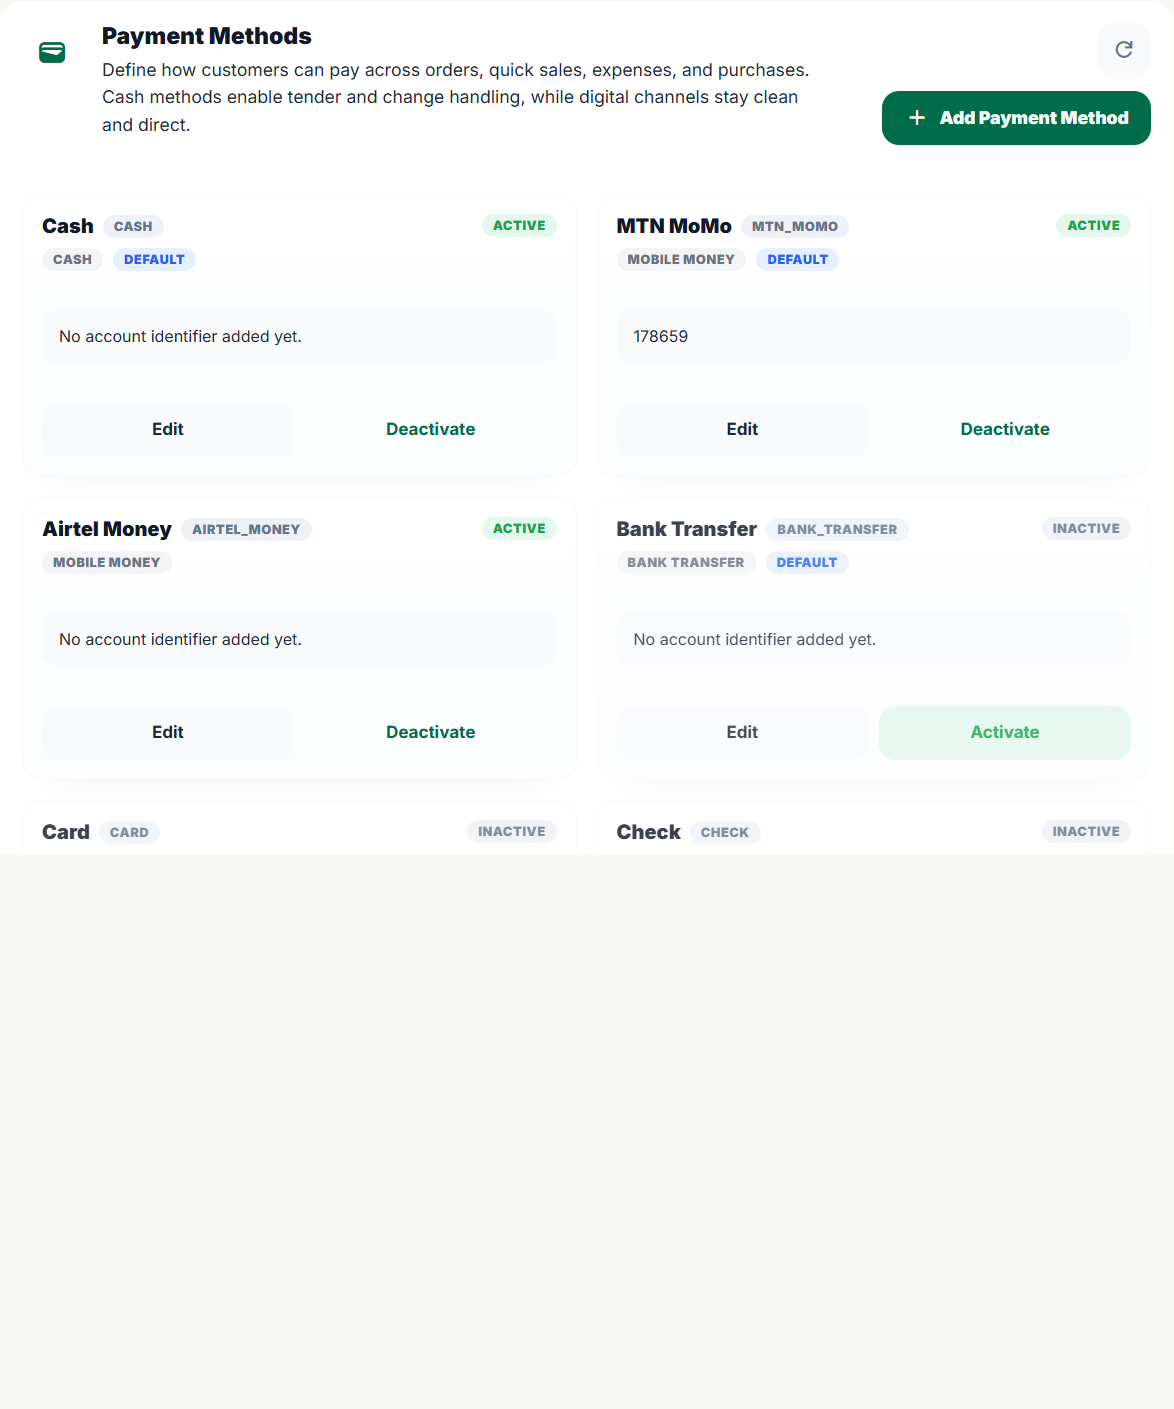
Payments Tab
This tab controls which payment methods appear when recording a sale, order payment, or expense payment. Standard options (Cash, Mobile Money, Bank Transfer, Credit) are built in — you can enable or disable each one.
To add a custom method, click + Add Payment Method and give it a name (e.g. "Cheque", "POS Machine", "PayPal"). Custom methods work the same as built-in ones and appear alongside them in all payment forms.
Keeping only the methods you actually use reduces confusion for staff at checkout. Disable any methods that don't apply to your shop.
Marketing Sources Tab
Marketing sources are the channels through which customers find your shop — for example, Instagram, WhatsApp, Walk-in, Referral, or Google. When staff create an order, they can optionally tag the marketing source.
Add the sources relevant to your business here. Each source you add appears as an option in the order form, and the data feeds into the Marketing Report in Reports & Analytics.
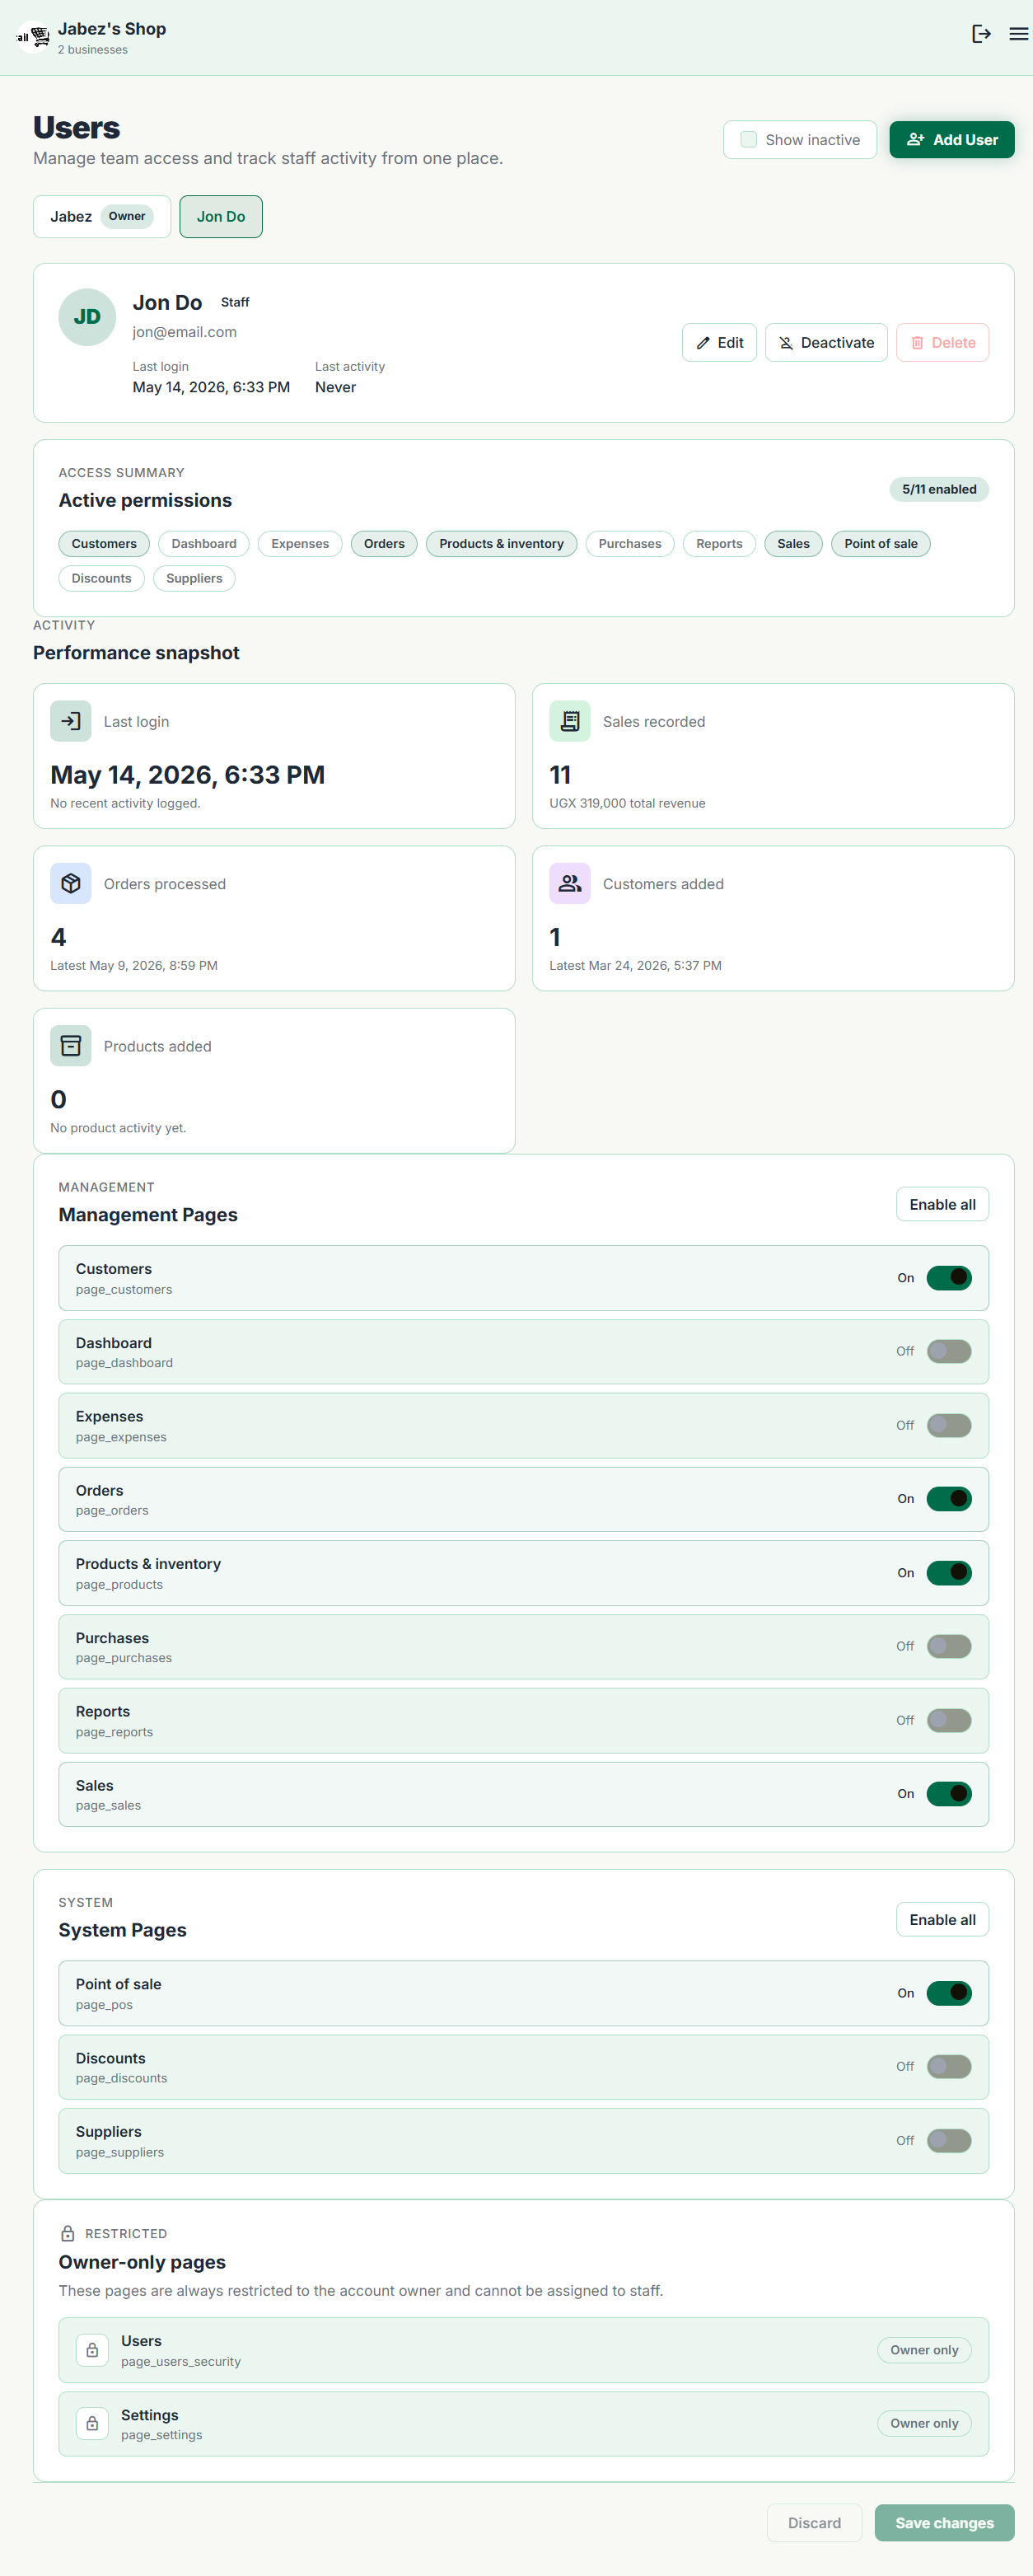
Managing Users & Staff
User management is found in the Users section (separate from Settings, accessible from the left navigation). Here the owner can add staff accounts and control exactly what each person can do through page-level permissions.
Adding a User
-
1
Go to Users and click + Invite User.
-
2
Enter their name and email address, then configure the pages and actions they should be allowed to access.
-
3
They receive a link to set their password and log in. Once they do, they can access the shop according to their permissions.
Page-Level Permissions
On a user's profile page, there is a permissions panel where you can toggle access to specific areas:
- toggle_on Allow or deny access to Reports, Purchases, Expenses, Customers, and Settings independently.
- toggle_on Allow or deny the ability to apply discounts, cancel orders, or approve expenses.
To temporarily prevent a staff member from logging in — without deleting their account — use the Disable Account toggle. Their history and records are preserved. Re-enable any time.
Only the Owner / Admin can add, edit, or disable other users. A staff member cannot change their own permissions.